

Tips and...
Come one come All! Share your tips, free patterns or whatever else you'd like contribute! Send your documents (.doc, .pdf or whatever...no copyrighted materials PLEASE) to webmaster@capitolcityquiltguild.org I'll do my best to add it as quickly as possible.
THANKS!!
![]()
Other Tips and...

Dogtooth Border
This method of making a Dogtooth border requires you to cut an equal number of rectangles of two fabrics to make each unit. This is a good method if you want to make either a scrappy border or a border of just two fabrics. You can make the border any width that you would like, keeping in mind that the finished length of the rectangles you cut must equal two times the width. Examples below of the count of fabric needed are for a 2 inch wide finished border. In these examples, tie rectangles would be cut 2 1/2 X 4 1/2 inches. You will have to make adjustments according to your quilt size and border width desired.
| Quilt Size | Total Length Of Borders |
No. of Dogtooth Rectangles |
Dogtooth Fabric |
Background Fabric |
| Wall Quilt (30" X 45") |
150" | 40* | ½ yd |
½ yd |
| Bed Quilt (90``x110``) |
400" |
102* | 1 yd |
1 yd |
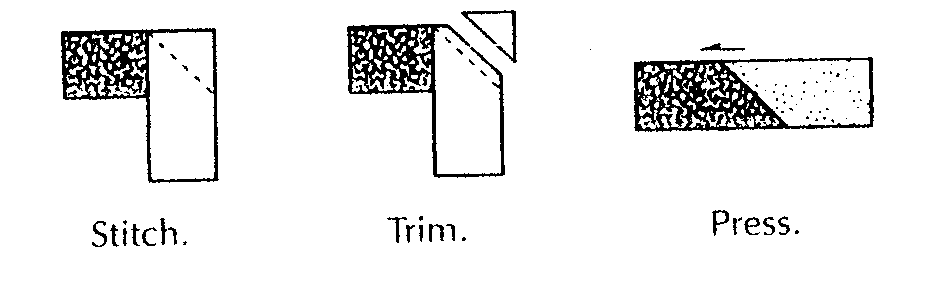
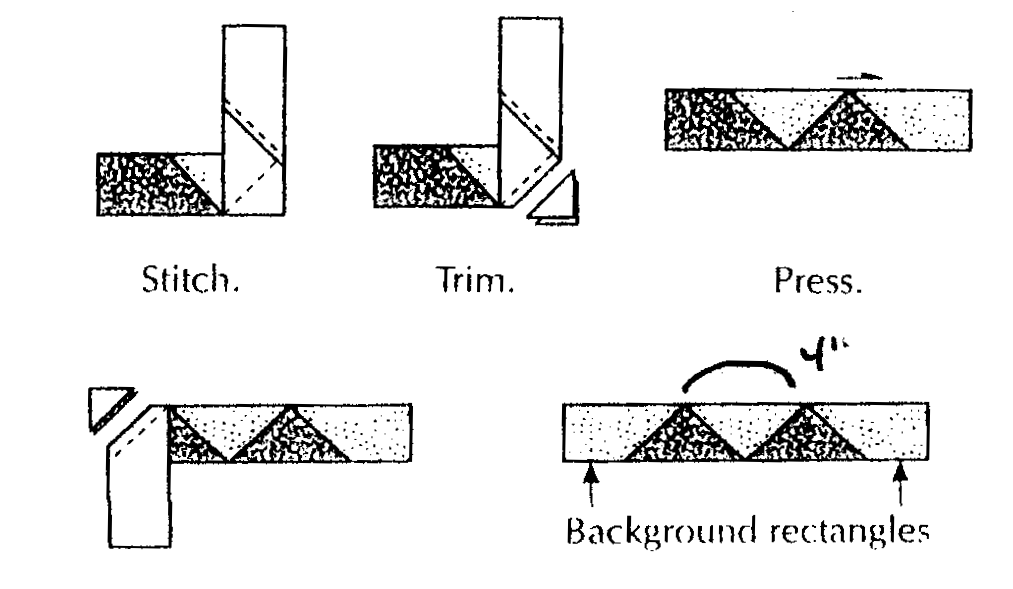
Cutting and Assembly
1. Cut the number of 2 1/2`` x 4 1/2`` rectangles required for your quilt size.
2. Speed-piece background rectangles to dogtooth rectangles as shown.
3. Speed-piece the pairs as shown. Sew the pairs into fours, and the fours into eights, continuing it`s the borders are long enough for the quilt top. Begin and end each border strip with a background rectangle.
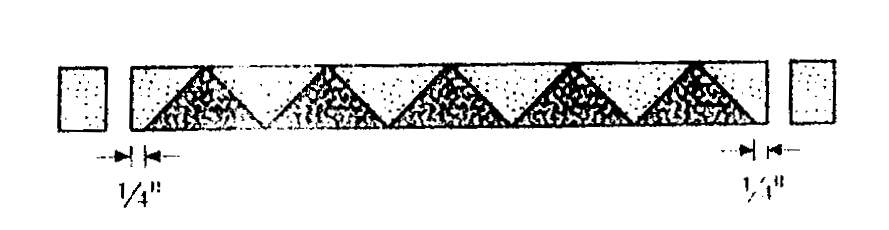
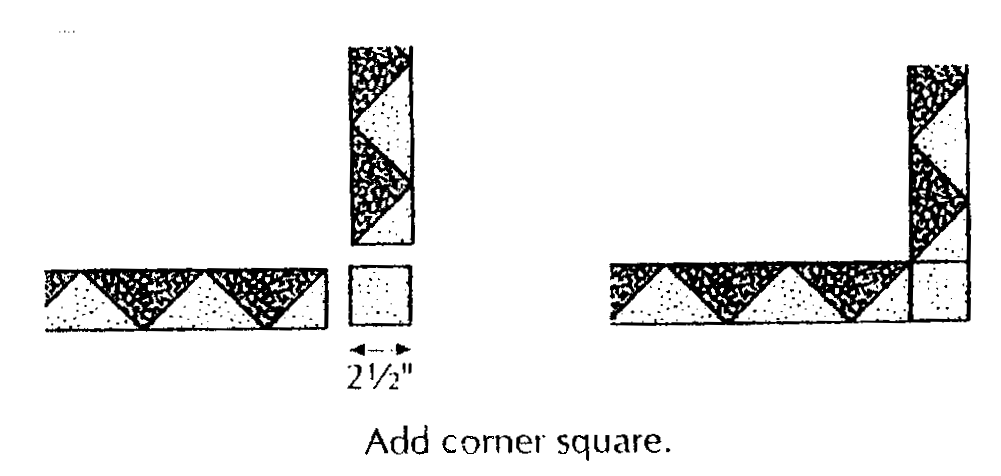
4. Trim the ends of the borders, leaving a I`m wide seam allowance. Cut 2 %`` background squares for the corners.
5. A different corner method is shown below. The length of each border must still be a number of complete repeat units, but begin and end each border with a half unit. For example, if the length of the border is 12 Dogtooth units, the easiest way to do this is to make the border 13 complete units long, then trim half of a unit off each end leaving a 1/4" seam allowance. Construct the side borders in this manner. The top and bottom borders must also begin and end with half units. On these border strips, however, don`t trim off the excess half units; they take the place of the corner squares.

